Home Maintenance And Repair

A Home Maintenance And Repair Checklist For New Homeowners

A Home Maintenance And Repair Checklist For New Homeowners

As a new homeowner, you’re probably focused on your financial status after buying a home, but you shouldn’t forget about the maintenance and repairs. Your home is an investment that requires regular maintenance from day one. Just like purchasing a car, you need to follow a regular schedule for its upkeep to keep it safe and functioning well.

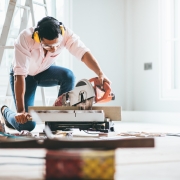
Maintaining and repairing your new home not only makes it look appealing but also saves you from wasting your money and possible headaches. It can be intimidating as a new homeowner to check off all the tasks on your list, but you don’t have to do this all alone. You can count on local tradies for an incredible home improvement and repair job. 

Before you call professionals to do the job, it’s good to have an idea of what a general home maintenance and repair checklist looks like. We’ve come up with a list to make it easier for you.

Home Maintenance And Repair for new homeowners

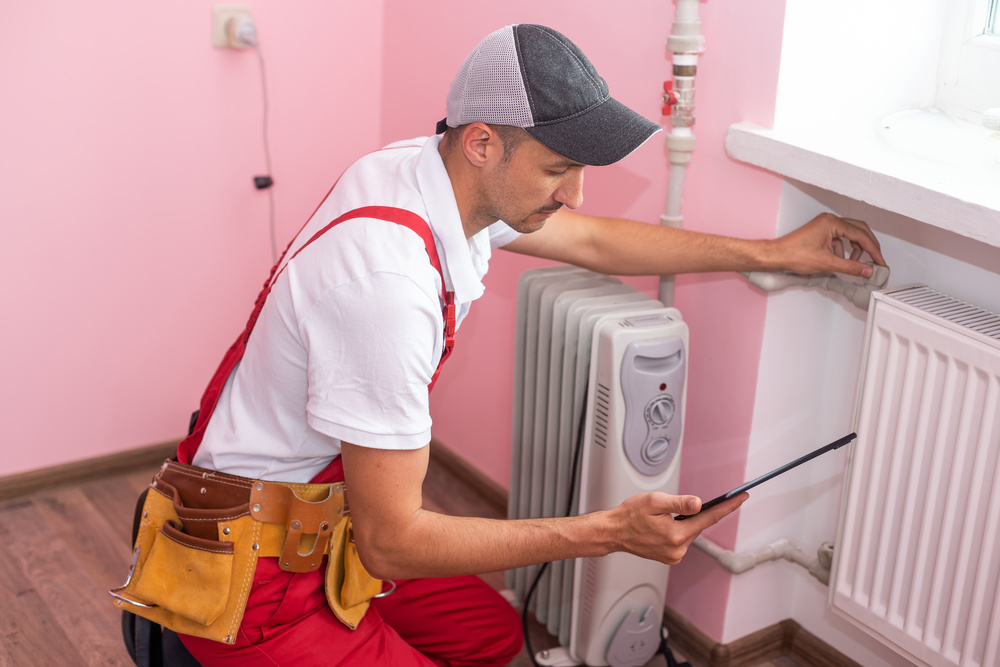
Check your air conditioning system

Regularly checking your air conditioning will help you spot possible damages and address them promptly before you end up sweating in your home. Your new air conditioning system may function well once you move into your new home, but regular cleaning and maintenance checks will allow it to cool efficiently without using too much power. 

If you find it difficult to know whether it’s functioning well or not, consider calling air conditioner repair services for more clarity. Luckily, if you get a good repair service team, they’ll give your air conditioner a general assessment at a reasonable price.

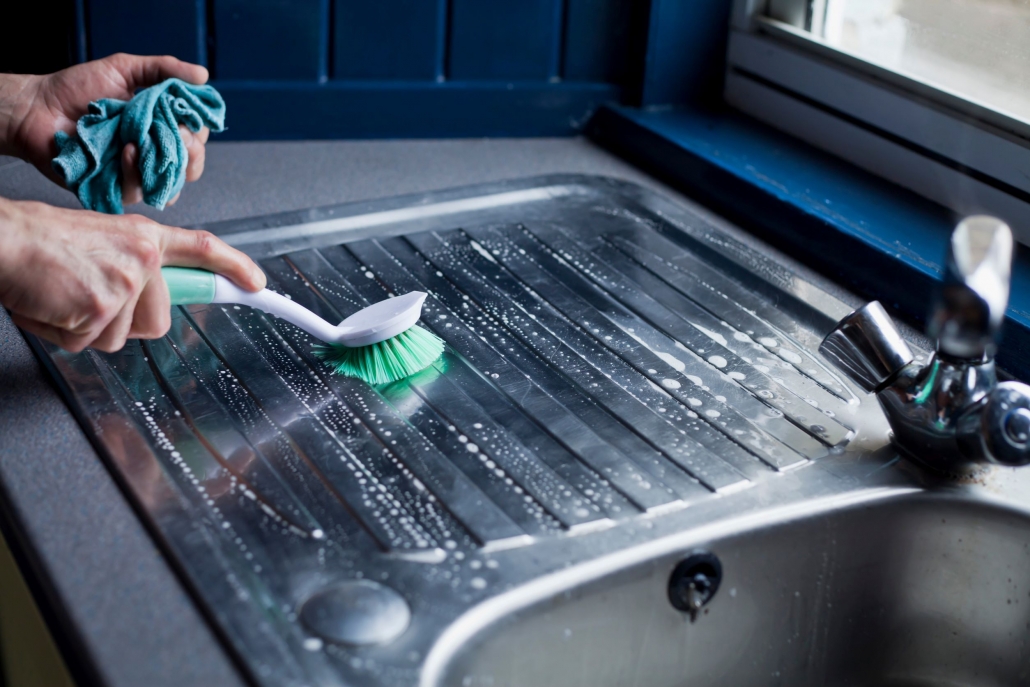
Deep clean your entire home

You should have a schedule around the year for deep cleaning your home. Deep cleaning not only ensures that your home is spotless but also allows you to check for areas that may need repair. Scrub walls and the floor thoroughly, or hire a professional to help you deep clean the crucial places in the house. 

It’s an excellent feeling to live in a clean house. Fortunately, if you want to save on your budget, you can handle most of the cleaning alone without much experience. A clean home is easy to arrange and maintain, saving you time and energy after moving in as a new owner. The essential parts of your home that need cleaning include the kitchen, bathroom, filters, and living areas. 

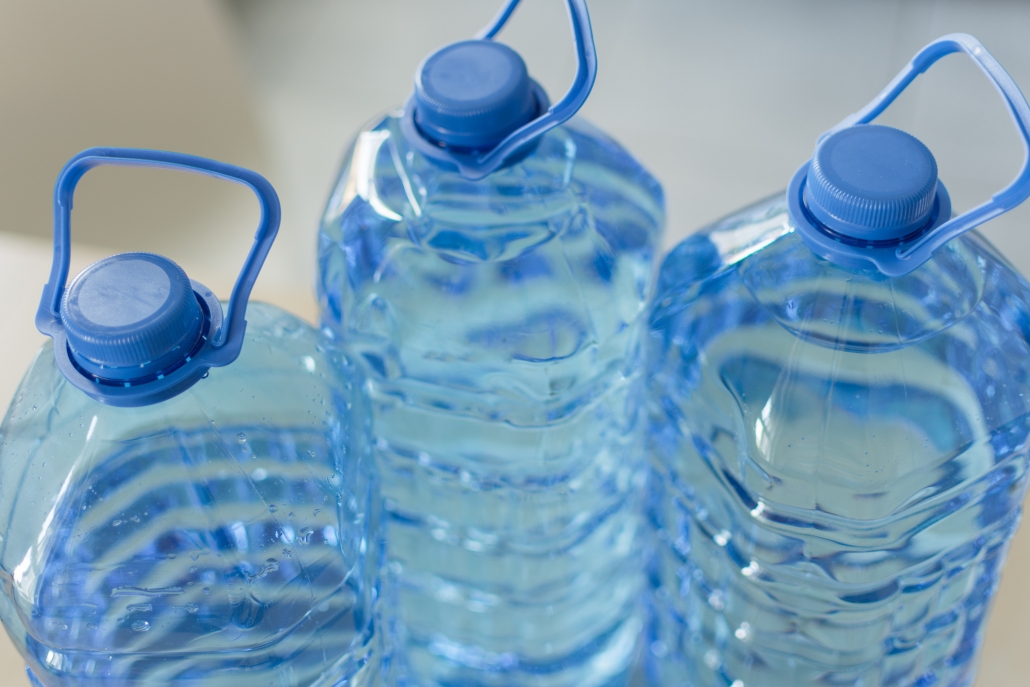
Check your electric and water controls

It’s vital to check the electric and water controls before settling down because you might find that the controls have been tampered with, so you’ll probably be paying too much or less than expected. You should also be familiar with your electricity and water controls. You must remember where they’re located and know how to use them.

It’s critical to know how to turn the controls off in the event of a storm or an emergency. If you’re unsure how to manage the controls, have an expert set it for you correctly.
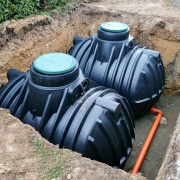
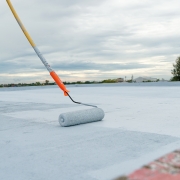
Check your drainage

Will heavy rain affect your home? If it will, you should find a way to draw water away from your home or have it waterproofed. Waterproofing reduces the moisture entering your home and helps keep it structurally sound.

Water should not settle around your foundation; it should be able to flow away from it. If you live in an area that frequently experiences inclement weather, you should be aware of the risks stormwater can bring to your property. 

Don’t forget to check if your gutters are damaged or blocked with leaves or debris, which can lead to inadequate exterior drainage. Thus, checking if your drainage system is functioning well is essential to avoid future damage and expensive repair costs.

Check your security devices

Safety is always the top priority when living in your own home. To ensure your safety, you should conduct regular maintenance and repair for your devices. You must ensure that all your security devices work well to prevent mishaps. This includes checking if all your detectors —gas, carbon monoxide—are functioning well to keep your family safe. Lastly, you can also install a CCTV system to boost your home security.

Conclusion

To maximise your efficiency and complete all the to-dos on your list, you might want to schedule an appointment with a trusted expert to help you conduct each task. Doing this will protect you from becoming too overwhelmed.

It’s essential to cover all the bases in your home for you and your family to live happily and safely in the coming years. Keeping a regular home maintenance and repair schedule can keep your expenses low, as you can spot trouble areas before they require major repairs or replacement.

Underground rainwater storage tanks

How To Store Water If You’re Short On Space

How To Store Water If You’re Short On Space

Water is an essential part of survival and one of the most important things you must have an adequate supply of. It is essential for drinking, cooking, cleaning, and toilet flushing. That’s why you can’t refute the truth that ‘you can’t do anything without water, but you can do everything with it.’

Water is part of the essentials that you should have in abundance. Therefore, it’s best to avoid a situation where you have no access to running or stored water. Whether you’re in a small apartment or house, you should be able to find some space for storing your water.

There are many ways to store water, and each method differs. Before deciding which method is best for you, you must know the pros and cons of each. Here are some ways to store water despite living in a small space.

1. Use an underground water tank

Consider installing an underground water tank if your water supply is limited and you have no room to store extra water inside your home. These containers sit below the ground’s surface and can hold thousands of litres of water. Despite it being out of sight, its underground location keeps it safe from harsh weather conditions and possible contamination.

If you’re worried about the underground storage tank having possible leaks, it’s best to be familiar with how to turn off the water supply in your home. Knowing how to turn off your water supply is also essential to avoid contaminating your home’s tap water.

2. Use a five-gallon bucket

When you’re short on space and need to store water, you can use this method because it takes up very little space. You can use a five-gallon bucket and fill it with water. Then, seal the bucket and store it in a cool, dry place until you need them. This method is excellent for storing water for long periods because it won’t grow bacteria as quickly as other methods. However, you must ensure that your bucket has an airtight seal before storing it.

3. Store it in plastic containers

Using plastic containers—specifically those marked as food-grade—is an excellent method if you’re short on space and don’t have any other storage vessels to store water. The main downside to this method is that the water stored in these containers must be used within a week as its food-grade quality doesn’t prevent microorganisms from growing.

Water storage

4. Get a jug with a spout

A jug with a spout can be easily stored on your kitchen counter or the top of the fridge. There are transparent options for these jugs, which is a great way to keep track of how much water you have left. The spout makes it easy to pour the water into cups or another container should you need to relocate your stored water or consume it.

5. Store it in glass bottles

If you’ve got glass bottles in your home, you can use this to store water instead of purchasing other storage vessels. Unlike plastic, glass doesn’t hold odours or chemicals, which makes it safer. But like plastic, glass bottles aren’t usually airtight, so it’s best to use the water within a week. And, of course, glass bottles are heavy and breakable, so you’ve got to store them in a space that won’t make them vulnerable to getting shattered.

6. Buy bottled drinking water in bulk

Buying bottled drinking water in bulk is a good idea if you’re expecting a storm to hit your area, as your water supply may be affected. Most bottled drinking water is stored in single-use plastic (SUP) bottles, so once you’ve consumed all the water, you can quickly dispose of it. However, refilling these bottles is not advisable as the plastic can leach chemicals into the water.

7. Use the bathtub

This method is a great way to save space and store water: all you need is a bathtub. Just fill it up with water and let it sit in your bathroom until you need to use it. Since it will be stagnant water, you must only use this method if you plan to use the water right away. Stagnant water can lead to multiple health hazards if left there for long periods.

Conclusion

Water is essential, and we can’t live without it. It’s important to have a source of safe drinking water for you and your family in case of an emergency or natural disaster. This will help ensure you have enough water in your home to survive.

The specific water storage method you choose depends on your needs and space. Regardless of your choice, ensure that any containers used for storing water are clean and not contaminated before filling them up with water. Lastly, if you’re hesitant about whether your stored water is safe for drinking, you can make it potable by boiling it to kill bacteria.

Bathroom renovations

Bathroom Renovations Inner West Sydney. 3 Costly Mistakes

Inner West Sydney bathroom renovations – 3 costly mistakes you do not want to make

A successful Inner West Sydney bathroom renovation will require a solid plan, regardless of the size of the new bathroom, or how extensive the changes. Not having a plan can leave you open to needless expense.

Weeks of noise and dust and unreliable tradies can also leave you frustrated and out of pocket. So that none of the above happens to you, we are here to make you aware of three major mistakes commonly made by homeowners when they plan a bathroom upgrade.
Read more

Hot Water System

9 Key Considerations Before Installing A Hot Water System

9 Key Considerations Before Installing A Hot Water System

Water is necessary for all households, and a hot water system makes it even better, especially during the cold season. It’s one thing to install a hot water system, and it’s another to have one that’s efficient in terms of saving time, energy, and money.

It’s essential to consider the cost of installing the system and the type, among other factors. This way, you don’t get into the high maintenance costs because of the repairs that must be done every so often. Service providers are available to offer hot water system prices that are affordable and manageable.

On the other hand, note that it’s time to replace or install a new hot water system when you have the following indicators:

  • Not enough hot water for showering, laundry, and dishwashing. 
  • Leaks and other physical damage to your tank
  • Release of infected water and inconsistent water temperature with low pressure

And to help you even further, this article will discuss what you need to consider before installing a hot water system. Read on to learn.

Hot water demand

You must first establish the purpose of the hot water in your home, the number of people in your home, how much everybody needs, and the plumbing work. Teenagers tend to use hot water more than younger children and adults. These factors will give you a clearer picture of the type of water heater to choose and install. This way, you can provide for the needs of the household without overspending.

Type of water heater

Various types of water heaters are available on the market, including indirect, solar, conventional, and tankless. For instance, opting for a tankless water heater is more efficient because you can heat enough water for various home uses at a reduced energy cost of 30%. But it would be best that you research well the advantages and disadvantages of owning any of these water heater types. And by then, choose one that fits your needs and budget.

Size of tank

It’s advisable to choose a tank depending on how much hot water you need for various uses in your home, like showering, laundry, and dishwashing. A larger capacity tank is preferable because it will cater to all hot water needs in the house. But again, it depends on what use you will need the water for. Look for one that will serve you best.

Installation time and professional/expert

It’s best to have a trained professional install your hot water system instead of doing it yourself because it’ll take more time. While a professional may spend at least three hours installing the system for whichever tank size you choose, it may take you a couple of days to do it yourself, depending on your knowledge of undertaking the task. Installing a tankless system takes more time, especially if it’s a replacement for a tank system.

Source of energy

Your energy source should determine the kind of hot water system to purchase. The energy sources available are electricity, natural gas, and solar. Natural gas and solar power are considered better alternatives because they’re less expensive than electricity. Solar power hot water systems are preferred because they’re more affordable than natural gas and electricity and release less carbon.  

Cost of installing a hot water system

The cost of installing a hot water system depends on the type and service provider. A tankless system costs about USD$2,000 more than a traditional one, with a tank costing USD$1,000. Service providers also offer different rates, so you have to take the time to shop around and negotiate for an affordable price that best suits your budget. 

Hot Water System Installation

Safety aspect

To prevent accidents, you must install a hot water system with safety features like thermal protection, vacuum valves, and pressure release valves. Doing so will not only ensure that your needs are met but also ensure your safety and the durability of the hot water system, which is guaranteed.

Availability of space

The available space in your house is a crucial consideration before installing a hot water system. However, it doesn’t limit you because of the various alternatives you can choose from. You may be unable to fix a standard-sized system because of the small space in your house. The good news is that you can have a shorter heater, e.g., a low-boy water heater that fits within the small space available and holds the same amount of water as a taller one. 

Guarantee period and maintenance

A water heater has a warranty or guarantee period of between three and twelve years. However, you can find heaters with a more extended service period but at a higher price. With proper planning regarding your budget, it’s more efficient to go for a hot water system with a more extended guarantee period. 

For the system to be long-lasting and to perform well throughout, it must be taken care of and maintained regularly. You are more advantaged when you purchase the system from a vendor that offers after-sale services. You can reach out to the service provider to help you if the system malfunctions. 

Conclusion

Providing hot water throughout the year is critical but not hard to achieve. You must plan to invest in a reliable hot water system carefully. Consider the effectiveness and efficiency so that you get value for money.

Smart and Simple Kitchen Cabinet Ideas That Your Cabinetmaker Can Recreate

Smart and simple kitchen cabinet ideas to recreate

Kitchen cabinets are unlike any other storage space in your house. Because they’re in such a high use area of the home, smart time saving and space maximising design features are essential. And because they’re housing food and potentially hazardous utensils, cabinets need to be constructed securely, with enough room to hold everything- even items which may not stack perfectly together. There are a few features you can chat to your cabinetmaker about, which will increase the efficiency of your kitchen storage tenfold. Here are a few of our favourite picks:

Read more

Building outdoor kitchen

The Ultimate Guide To Building An Outdoor Kitchen

The Ultimate Guide to Building an Outdoor Kitchen

Building an outdoor kitchen may be a great idea when upgrading your home. It’s an excellent addition to your property, allowing you to utilise your unused outdoor space. 

Are you planning to carry out an outdoor kitchen installation project? Consider today as your lucky day. Here’s a helpful guide to building an outdoor cooking area. Continue reading to learn more. 

Measure your outdoor space  

The first thing to do if you wish to build an exterior kitchen is to measure the dimensions of your space. It’d be difficult to conduct a renovation and purchase cooking equipment if it’s not compatible with your available open area.  

Hence, take note of your outdoor space’s dimensions and ensure it fits your kitchen layout. You can opt for an L-shaped kitchen if you need a spacious counter despite having a narrow property. This would allow you to save space and ensure you can move around your kitchen freely. Alternatively, if you have a sizeable exterior, you have more design options for your kitchen.  

When measuring the space for your outdoor kitchen, you should consider if you need to remove some walls or existing structures out of the way. For instance, you may have more space if you remove an unfinished backyard project like a patio or a fire pit. 

Outdoor kitchen

Hire a reliable construction company  

Although you can construct your outdoor kitchen yourself, hiring someone to do it for you may be easier and faster. It may be challenging to complete your cooking space without professional help, especially when it requires major construction.  

For example, you may damage your property if you attempt to drill holes in the wall without the proper equipment. However, you might not have any choice but to do it if you want to connect your kitchen’s water line and drainage to the main house. Fortunately, some companies have a core drilling concrete machine they can use to do the task.  

When choosing a company to hire for your kitchen construction, you should check their past works and reviews. This way, you can ensure they can meet your needs.  

Build a weatherproof kitchen  

Cooking outdoors is a fun activity you can do all year long. Nonetheless, there are times when external factors like the weather can prevent you from using your outdoor kitchen. Case in point, if your stove is in an open area, you may be unable to use it when it’s raining.  

So, if you wish to make the most out of your cooking spot, it’s ideal to add features that’d protect it from various weather conditions like extreme heat or rain. As an example, you can install a roof over your outdoor kitchen to enjoy your cookouts regardless of the weather. You may also weatherproof the most critical areas of the kitchen, like the floor and wall foundation, to protect them from leaks or damage.  

Additionally, it’s best to pick durable materials for various parts of your kitchen, like the drawers or storage space. It’s believed that stainless steel or excellent-quality wood are good options since they’re low-maintenance and can withstand various weather conditions.  

Add a dining area  

If you have a huge outdoor area, you can add a dining set to complete your kitchen. You can buy a small dining table and set up some chairs to eat your home-cooked meals in your outdoor space. Plus, it’s an excellent way to upgrade your property and create an area where you can entertain guests.  

You can also add some stools if you have a bar in your kitchen. This is a great way to utilise your space and make your cooking area appear more laidback.  

When choosing your dining pieces, it’d be best to match them with your house’s design. For example, if you use a lot of wood elements throughout your property, you can pick a dining set made of wood – it’d complement your kitchen well and make your space look and feel harmonious.  

Choose the right cooking equipment  

When building your external kitchen, you need to consider which equipment you want to include. If you hastily install all types of cooking tools without consideration, some of them may be left unused. Henceforth, it’s best to get products you prefer to use when you cook food.  

For instance, adding a grill in your kitchen would be a great idea if you want to have barbeque dinners outside your home. On the other hand, you can install an oven on your counter if you want to bake more often. Overall, it’s best to invest in cooking tools you know you’ll use rather than ones you simply want to maximise your kitchen space.  

Final thoughts

An outdoor kitchen is a great home project you can do to upgrade your property. Thus, when building one, it’s helpful to consider things like your exterior space and kitchen design to ensure it fits your preferences and needs. You should think long-term when selecting its materials and furniture so you can use your outdoor cooking area for years to come too. Lastly, keep in mind the helpful tips enumerated above for future use.

Bathroom renovations

Bathroom Renovations – How Do I Reduce The Cost?

Save money on your bathroom renovation by following these tips

A bathroom renovation is one of the best things you can do to add substantial value to your home. However, a complete bathroom renovation can get real expensive, costing up to tens of thousands of dollars. Budget-conscious home owners would naturally want to keep costs down, but still have the bathroom that they have always wanted.

Fortunately for home owners, there are a number of ways that they can reduce the cost of bathroom renovation without compromising on the quality of materials or the workmanship. Here are some of them.

Read more

Waterproof Your Home

3 Ways To Waterproof Your Home

3 Ways To Waterproof Your Home

Moisture build-up in your home can be disastrous for numerous reasons. It can cause damage to your house’s structure and health issues from the growth of fungi and mould in wet areas. Thus, it’s practical to look for measures to make your home waterproof. 

Waterproofing reduces the chances of water infiltrating your property by adding a protective layer. It helps reduce moisture and humidity inside your house too, thus reducing the risks of damage from occurring.

Many individuals use waterproofing and damp-proofing interchangeably, but these terms are different. Waterproofing prevents moisture or water from entering your house, while damp-proofing offers a barrier against vapor caused by temperature changes. 

It’s believed that the best time to waterproof your house is during construction or when you notice any leaks, cracks, or mould growth in your home. This post will outline different ways to waterproof your home. Take a look to learn more.

1. Roof waterproofing

Roof waterproofing is the first line of defence against leakages in your home. Roof waterproofing acts as a barrier between your home and the rain and other elements. This way, your home is protected from leaks, mould, and fungus growth. There are different ways of roof waterproofing which include:

Roof Coating Installation
  • Bituminous Roof Waterproofing

This type of waterproofing works great for residential and commercial building roofs.

Bitumen sealant is combined with a substance created from an organic liquid that is sticky. This results in effective waterproofing material for the roof. This reinforced membrane is more durable as it doesn’t wear down and has a long lifespan of over 50 years of roof cladding

Bituminous waterproofing is mainly used on flat concrete roofs. The only disadvantage of this type of waterproofing is that it produces fumes that can cause respiratory issues in the future.

  • Cementitious Roof Coating

The cementitious coating is made from sand, silica-based substances, and organic and inorganic chemicals. It creates a waterproof seal that provides a durable layer that lasts for years. This type of waterproof roof is easy to use and apply with the right technique. The disadvantage of this coating is that it’s inflexible—it ends, compresses, and stretches over time.

  • Roof Waterproofing Treatment

This method uses a clear penetrative chemical solution that provides waterproof properties to your roof. The chemical solution is applied on the roof and is flexible and durable. It’s most suitable for metallic roofs, tiled roofs, or flat concrete roofs. The advantage of this waterproofing method is that it’s environmentally friendly, mess-free, cost-effective, and doesn’t cause any harm to humans.

2. Exterior waterproofing

When the exterior walls of your home are exposed to high humidity or rainfall, water can be absorbed and travel through the masonry to your house. As a result, walls may take longer to dry, leading to mould growth or damage to your walls. There are different ways you can prevent water from entering your home through the walls which include:

  • Check the walls for any faults like cracks or holes that may allow water to pass into your home. After spotting the faults, repair them to prevent water infiltration to your home.
  • Utilize waterproof products like concrete waterproofing coating, waterproofing paint, and silicate-based concrete sealer. All these products can be applied to exterior walls and help prevent water from affecting or entering through your walls.
  • Add a waterproofing mixture to plaster ingredients to prevent your walls from infiltrating water.
  • Install different kinds of gutters to prevent roof water from dripping down your walls. Gutters direct water away from your home.

3, Foundation waterproofing

Your home’s foundation is one of the most crucial sections, as the entire building is built on it. While the foundation is made of solid rocks, cracks can develop, allowing water to penetrate your house. Also, concrete is permeable (allows water to pass through). Ground waterproofing is essential as it protects the ground structure from costly damage. 

The following are some ways to waterproof your foundation:

  • Dig around the outer perimeter of your basement until you reach the base of the foundation. Then apply a protective membrane around the foundation walls to prevent water infiltration through the walls or any cracks.
  • Repair any cracks on the foundation walls and then apply a foundation sealant, a cement-based sealant that hardens and closes wall pores, thus preventing water from infiltrating your home
  • Some cracks fail to be sealed even after applying the foundation sealant. In such a case, you should apply the waterproof membrane to prevent water from slipping through the cracks.
  • You can also install a drainage mat, which helps water flow away from the foundation. Its dimpled design allows water to accumulate and flow away from the foundation.

Conclusion

Given the catastrophic future that water leaks can bring, any noticeable leaks should be addressed immediately before causing costly repairs. This calls for adopting different ways to waterproof your home, to avoid water damage of all sorts to your home. Hopefully, the insights mentioned above will direct you on the right path when waterproofing your home.

Safety Tips For DIY Home Projects

Top 6 Safety Tips For DIY Home Projects

Top 6 safety tips for DIY home projects

DIY projects are fun and rewarding. They give you a sense of pleasure and achievement and offer you the opportunity to develop new skills, such as fixing a hole in the wall.

However, renovations can be dangerous if you fail to adhere to safety measures. Hence, it’s important to know what you should do and shouldn’t. Read on to learn about the top safety tips for DIY home projects.

1. Research your DIY project

Before embarking on any DIY project, it’s essential to understand how to go about it and the tools required. Study the labels on the tools and the materials you’ll be using and follow the guidelines provided. If you aren’t sure of how to use the tools, research online. For example, midrange clamps are tools you’ll need when working with wood.

2. Put on protective gear

Most accidents that occur during DIY projects result from minor issues, such as failing to wear protective gear. For instance, painting or working with power saws without safety glasses or goggles will put you at risk of blindness. Protective eyewear is necessary to keep dust and flying debris from hurting your eyes. Moreover, you need to wear gloves to protect your hands while working with wood and other hard materials. Gloves keep your hands safe from lacerations and cuts.

Aside from using protective eyewear and gloves, you need to wear proper clothing, such as workwear by Workwearhub. Avoid wearing shorts or going barefoot when doing any project. Wear jeans to protect your legs from broken glass or wood chips that might cause severe injuries. Opt for steel-toe boots if you plan to use dangerous equipment, like a weed wacker or a lawn mower. Put on a long-sleeve or an oversized shirt and an apron to protect your body from flammable liquids, cleaning agents, and caustic materials.

DIY safety tips

3. Know how to use a ladder

If you’re scared of heights, avoid climbing up a roof or doing anything that requires going up. Leave the task to a professional instead.

But if you aren’t scared of heights, make sure you know how to use a ladder safely. Use the right ladder that’s made of a sturdy material, such as metal, wood, or fiberglass. Apply the three-point anchor while working on a ladder: Always have both hands and one foot or both feet and one hand on the ladder.

Here are other tips for proper ladder usage:

  • Lock the A-frame ladder and keep it open.
  • Avoid stepping on the top two rungs.
  • Set up the ladder on a stable, level surface.
  • Don’t work with electrical tools while standing on an aluminum ladder. Since aluminum ladders are good conductors of electricity, you could get electrocuted and fall.
  • Follow the 4 to 1 rule: Position the ladder one foot away from the wall or any vertical surface for every four feet of height where the ladder rests against the surface. That means that when you climb to the roof, the ladder should extend above the edge at least three feet.
  • Don’t put a ladder in front of an open door.

4. Stay alert when working with anything electrical

When working with anything electrical, ensure that the power is switched off or the equipment is unplugged when not in use. The following are some things you should remember:

  • Keep water away from power sources.
  • If you aren’t wearing trainers, stand on a rubber mat while using electrical tools.
  • Always turn off the power before repairing a device or working on a circuit. Let a professional take over if you feel unsure or anxious to fix it yourself.
  • Don’t use tools with disabled guards or frayed cords.

5. Let professionals handle gas repairs

While gas is an efficient power source, it’s hazardous. For instance, you could create a leak unknowingly. The gas will build up in your home and may lead to an explosion that’s set off by static electricity.

So, if you want a gas repair done, contact your power company. Don’t hesitate to leave with your family if you smell gas or notice a gas leak. Seek professional assistance once you’re in a safe place.

6. Invest in fire extinguishers

Before getting to work, have fire extinguishers at hand. It will be practical to have a couple of extinguishers for your home. Buy general purpose A-B-C rated fire extinguishers, which protect you from burning electrical insulation and components, burning liquids like grease, as well as materials that include wood and paper.

You can put one fire extinguisher in the kitchen and the other close to your DIY workbench.

Conclusion

DIY projects are a wonderful opportunity to improve your home. Though they’re exciting to do, they can be dangerous. Thus, you need to take safety precautions, such as wearing protective gear.

Outdoor blinds

Reasons To Decorate Your Space With Outdoor Blinds

5 Reasons To Decorate Your Space With Outdoor Blinds

Maximising the living space is a practical home trend that’s getting extremely popular worldwide. Also, taking indoor activities outside has become the norm for families who want to feel connected yet wish to exercise caution.

From creating a living room extension on the patio to building an outdoor kitchen, outdoor shading is one of the most common investments made by Australian homeowners looking to enjoy an ‘indoors-out’ lifestyle. But placing furniture outside requires protection from the elements, as well as privacy and security. This means choosing quality, durable and modern outdoor blinds is key.

Outdoor blinds can complement various home designs. If you’re planning to enhance your home exterior, consider these customisable covers and discover how to add value to your home with outdoor blinds.

Read more